AWS IAM provides many different methods to securely manage the services provided by AWS. One of these is the IAM Role, which allows users to avoid storing credentials, thus reducing the risk of unauthorized access. In this role, temporary credentials are dynamically assigned to the AWS Service.
In this article, we will look at how to use an IAM Role to access S3 from EC2 instances. Notably, connecting S3 with EC2 is one of the most common combinations in any deployment.
The benefits of using IAM roles to integrate S3 with EC2 are manifold. Firstly, they allow for granular control over permissions, ensuring that EC2 instances can only perform specific actions on S3 buckets as explicitly allowed. Moreover, they automate credential management, eliminating the need to manually rotate keys or embed them in code. Lastly, using IAM-roles can improve the scalability and maintainability of AWS infrastructure by making it easier to manage permissions as your environment grows or changes.
Prerequisites
Before setting up an IAM role for S3 and EC2 integration, several prerequisites need to be in place:
- AWS Account Setup: You should have an active AWS account and be able to log in to the AWS Management Console. Having the necessary permissions to create and manage IAM roles, EC2 instances, and S3 buckets is also important.
- Existing EC2 Instances and S3 Buckets: You should have at least one EC2 instance and one S3 bucket in your AWS account. These will be used to demonstrate how the IAM role facilitates the interaction between these services.
Creating the IAM Role
Creating an IAM role involves several steps in the AWS Management Console. Here’s how you can create one specifically for allowing an EC2 instance to access an S3 bucket:
To begin, navigate to the IAM dashboard from the AWS Console. Once inside the dashboard, select “Roles” from the left sidebar.
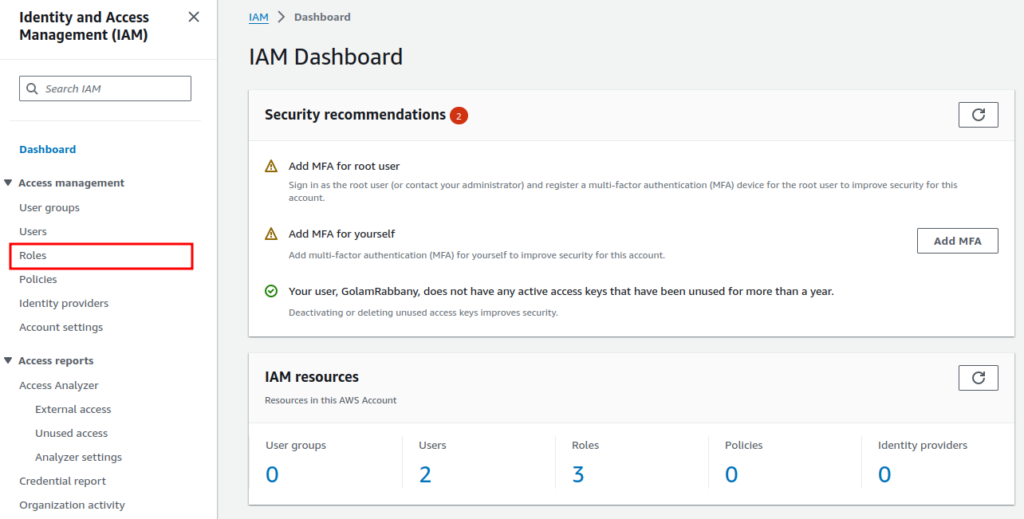
Subsequently, you will be able to see all the existing roles for the current user. Depending on your account these roles might differ. Now click on the “Create role” button.

In the “Trusted entity type” selection, choose “AWS service” since we are going to be using it for an AWS service. The IAM Role can also be used for other purposes shown here.

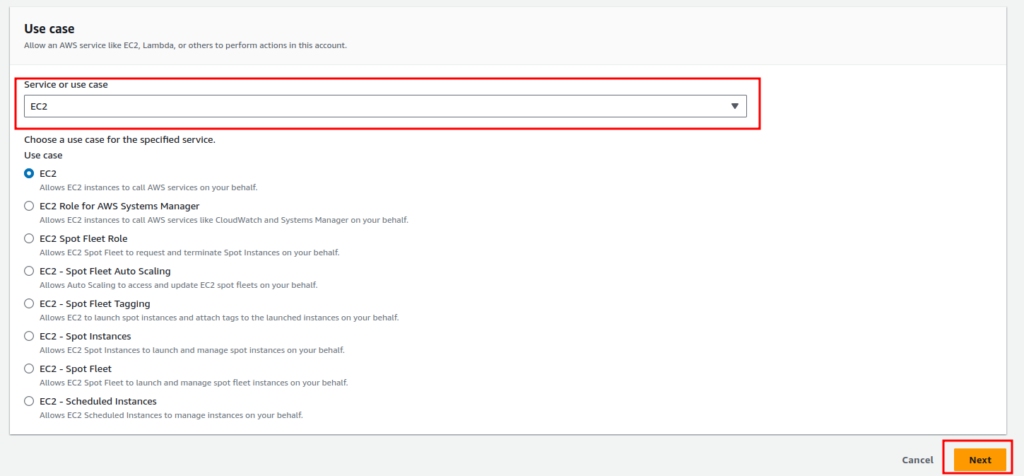
Following this, in “Use case,” select EC2 and click on next. To keep this demonstration straightforward, I will focus only on aspects that directly involve the demonstration.
On the next screen, you will see all the pre-made policies for the IAM Role. Type “s3read” in the search bar and select the policy “AmazonS3ReadOnlyAccess,” which will provide the role inheritor access to read S3 files. Disregard the “Set permissions boundary” and click on “Next”.

Now, enter a role name and a brief description.
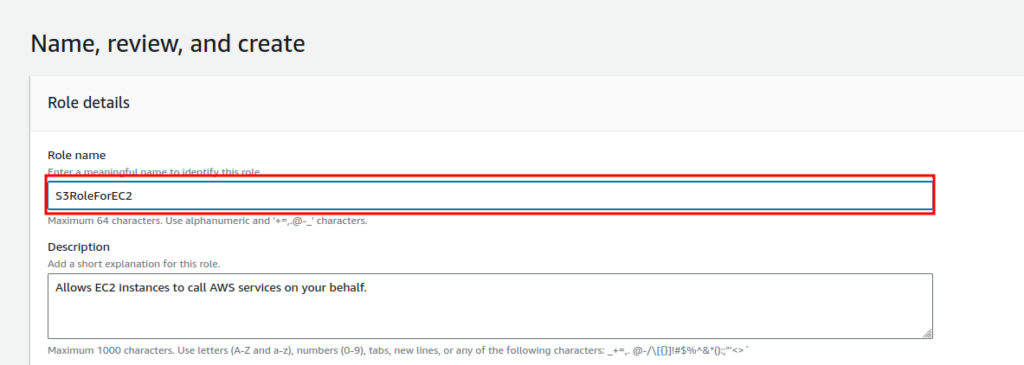
Finally, review everything and click on “Create role”.

This action will create the role.
Attaching the IAM Role to an EC2 Instance
After the IAM Role is created, it’s time to attach the permission to an EC2 instance. Navigate to the EC2 instance dashboard, select the EC2 instance and from the “Actions” dropdown menu, select “Security” and click on “Modify IAM Role”.

Here, select the IAM Role we created and click on “Update IAM role”.
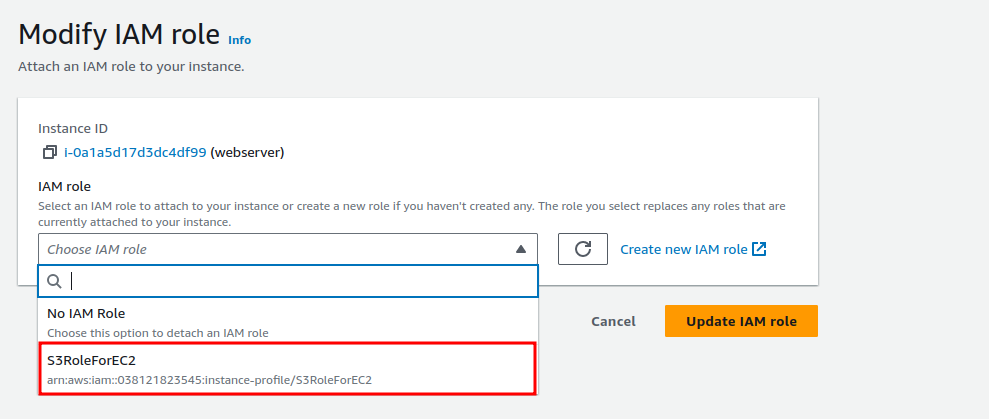
Consequently, the EC2 instance now has all the permissions it needs to access the S3 bucket.
Accessing S3 buckets from EC2 instance
Now, let’s access S3 buckets from the EC2 instance. Initially, log in to your EC2 instance. If you are not using AWS AMI Amazon Linux, you may need to install the AWS CLI to access S3 buckets.
To verify if you have AWS CLI, execute the command aws –version.

Once it’s confirmed, execute the aws s3 ls command. This command will output all the s3 buckets available in your account, within the region.

We can confirm this bucket’s existence form viewing them in the S3 console.

Additionally, let’s also see what’s inside the bucket using the aws s3 ls s3://bucketname command.

With the permission we have, we can read, the files and also copy the files to our system. To copy files you can use the command `aws s3 cp s3://bucket/file .`.

And if we try to upload something to the bucket you will notice the access denied error.

Subsequently, navigate to the IAM role we created, click on “Add permissions” and select “Attach policies”.

Afterward, add the policy “AmazonS3FullAccess”, so it will provide our ec2 instance write access.

Once done, run the copy command again. And this time it will work without any issues.

That’s the benefit of using IAM roles, you can change the permissions at any time. Attach multiple instances or AWS services. And also easily delete the role.
How to detach and delete the IAM Role
Firstly, to detach the role, select the same Actions > Security > Modify IAM role.

Then, choose “No IAM Role” and click on “Update IAM role.”
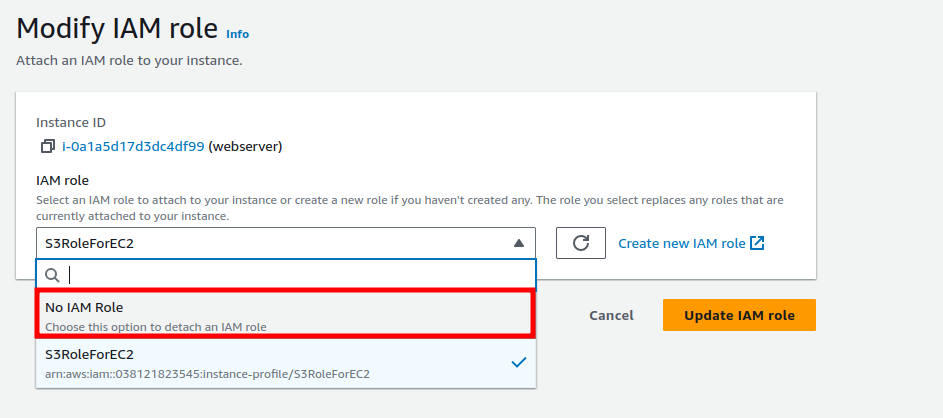
Proceed by entering “Detach” as a confirmation. This action will remove the access from the EC2 instance.

Next, to delete the role, navigate to the IAM-role you previously created, and click on the “Delete” button.

Finally, confirm the deletion by clicking on “Delete” once more.
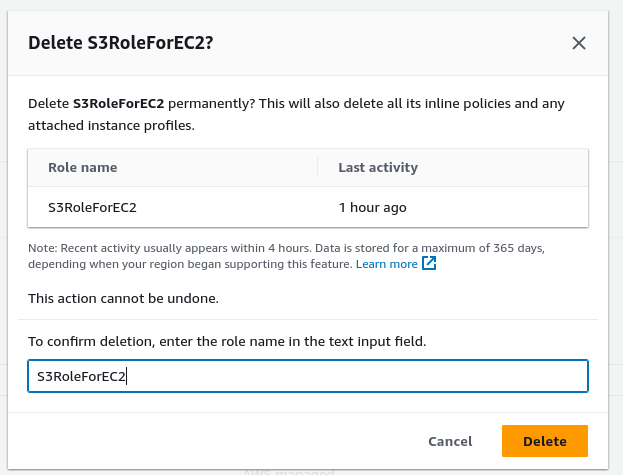
This will successfully delete this role.
☁️ Ready to harness the full power of AWS but not sure where to start?
From infrastructure setup and cost optimization to security and automation, Elite Cloud helps you build, scale, and manage your AWS environment with confidence.
👉 Book a consultation with the Elite Cloud team today and let’s turn your AWS goals into reality—efficiently and securely!

