Google Cloud Shell is a browser-based, interactive shell environment for Google Cloud Platform (GCP). It gives you command-line access to your cloud resources directly from a web browser and comes pre-loaded with essential tools to help you manage your cloud infrastructure efficiently.
This guide walks you through Cloud Shell step-by-step, explaining each action beforehand so you understand what you’re doing and why it’s important.
What is Google Cloud Shell?
Google Cloud Shell is a Debian-based virtual machine that provides a pre-configured environment for managing your cloud resources. It includes 5GB of persistent storage, ensuring your data is saved securely across sessions. This eliminates the need for manual backups or local setups.
It’s a perfect environment for managing cloud projects without local setup.
Prerequisites
Before you start:
- Have a Google account.
- Access the Google Cloud Console at https://console.cloud.google.com.
- Make sure you have a billing-enabled GCP project.
Setting Up Google Cloud Shell
Step 1: Launching Cloud Shell
This step opens a virtual command-line environment in your browser, allowing you to manage GCP services without installing anything locally.
Go to https://console.cloud.google.com and click the Cloud Shell icon (a terminal-like symbol) in the top-right corner.
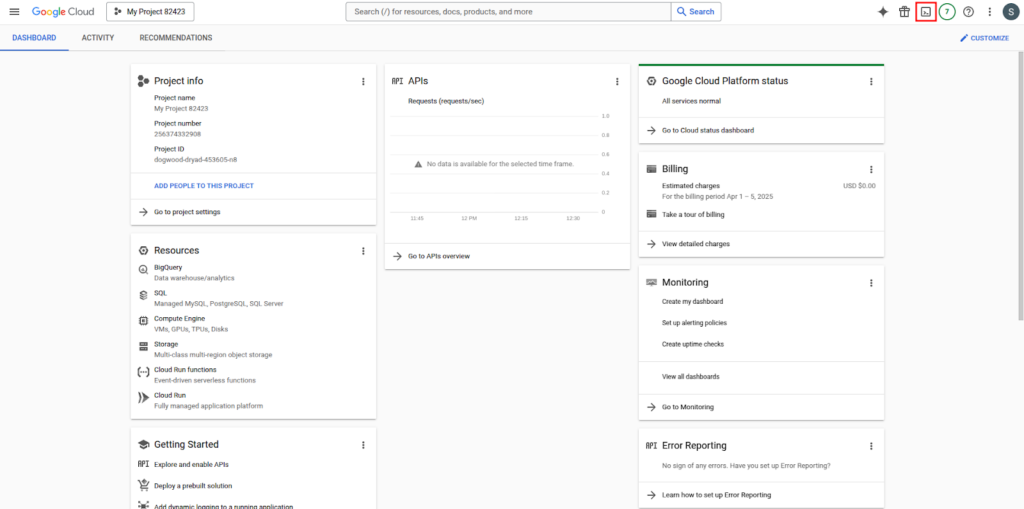
Wait a few moments while your session starts. A terminal will appear at the bottom of the page.

Step 2: Exploring the Cloud Shell Environment
Run `pwd` to display the current directory.

Run `ls -la` to list all files, including hidden ones.
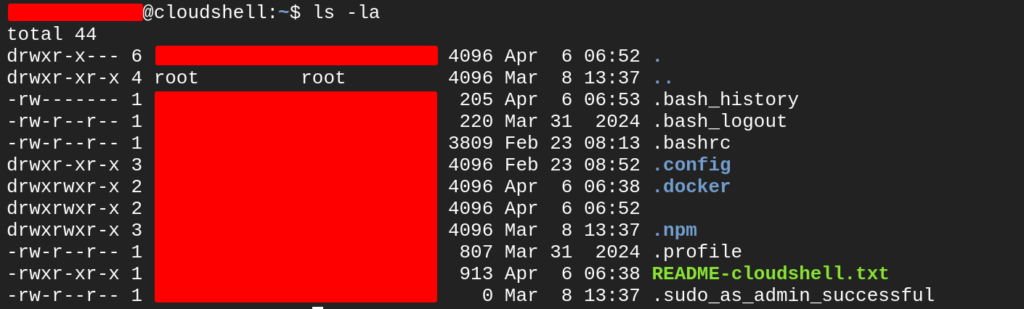
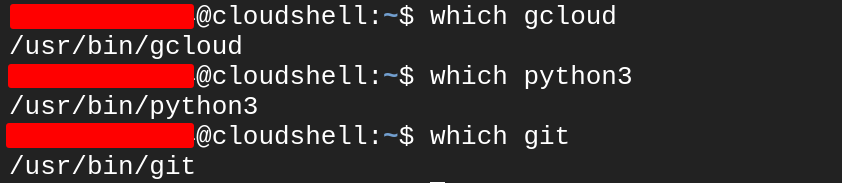
Cloud Shell starts in your home directory, which is saved across sessions. You can also verify available tools with:
- `which gcloud`, `which python3`, `which git`
Step 3: Configuring the gcloud CLI
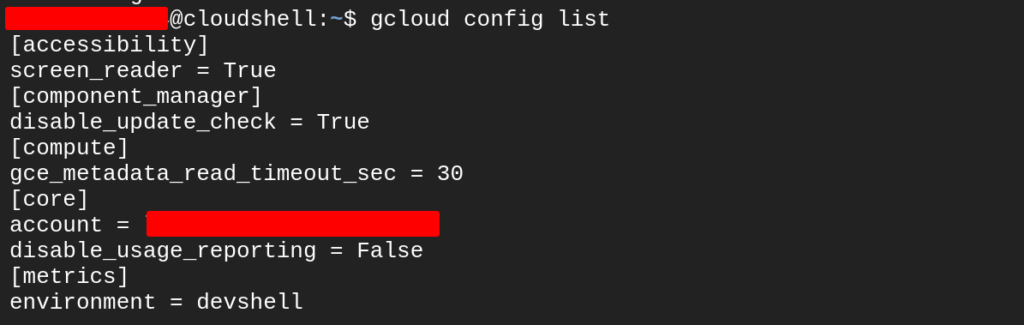
The gcloud command-line tool is used to manage GCP services. Next we’ll configure it to work with our specific project.
Run `gcloud config list` to see current settings.
Then run `gcloud projects list` to view your available projects.

Then set your desired project using, `gcloud config set project YOUR_PROJECT_ID`.

Replace YOUR_PROJECT_ID with the actual ID shown in the list.
Step 4: Deploying a Sample App on App Engine
We will deploy a simple “Hello World” web application to App Engine using Python and Flask.
Create a directory using the command, `mkdir hello-app && cd hello-app`

To build a basic app create a file named app.py with the following content:
“`
from flask import Flask
app = Flask(__name__)
@app.route(‘/’)
def hello():
return ‘Hello, World from GCP Cloud Shell!’
“`

Create a requirements.txt file, `echo “Flask==2.3.2” > requirements.txt`

Create an App Engine config file named app.yaml with the content:
“`
runtime: python39
entrypoint: gunicorn -b :$PORT app:app
“`

Initialize App Engine (only once per project) `gcloud app create`
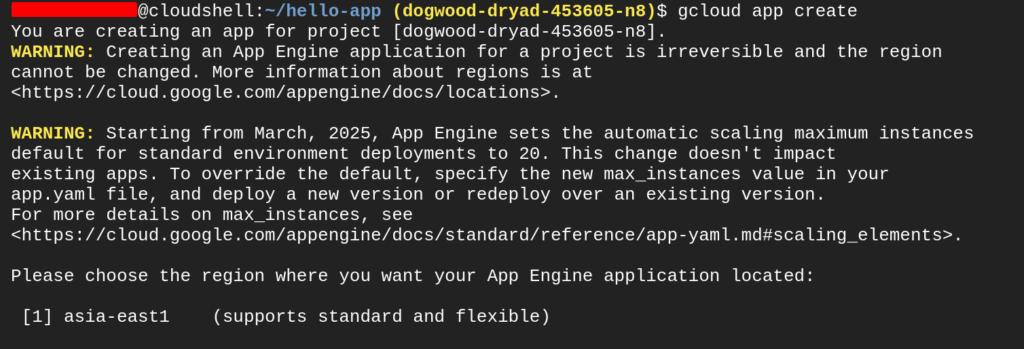
Choose a region near you when prompted.
Deploy the app using, `gcloud app deploy`
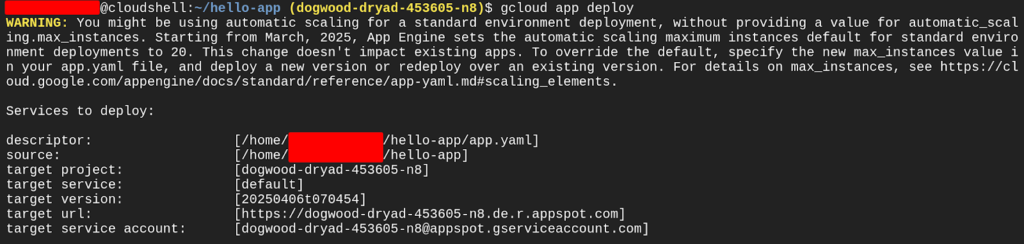
Confirm with Y when asked.
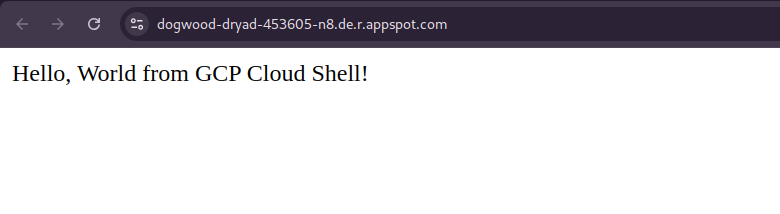
To view your deployed app run `gcloud app browse`

Upon viewing the link we can find our simple flask app.
Step 5: Working with Cloud Storage
We’ll use gsutil to create a storage bucket, upload a file, and make it public.
First create a bucket, `gsutil mb gs://YOUR_BUCKET_NAME/`

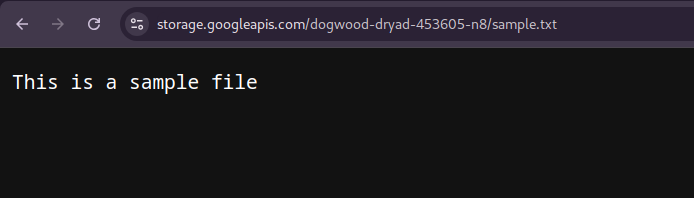
Then create a sample text file by running the command, `echo “This is a sample file” > sample.txt`

Upload the file into our previously created bucket, `gsutil cp sample.txt gs://YOUR_BUCKET_NAME/`

Make the file publicly accessible, `gsutil acl ch -u AllUsers:R gs://YOUR_BUCKET_NAME/sample.txt`

Access the file in your browser:
https://storage.googleapis.com/YOUR_BUCKET_NAME/sample.txt
Step 6: Cleaning Up Resources
To avoid unnecessary charges, it’s good practice to clean up resources when you’re finished.
Delete the App Engine service, `gcloud app services delete default`

Delete the storage bucket, `gsutil rm -r gs://YOUR_BUCKET_NAME/`

Optionally, delete the entire project, `gcloud projects delete YOUR_PROJECT_ID`

Bonus: Tools Available in Cloud Shell
Cloud Shell includes many pre-installed tools:
- gcloud: For managing GCP services
- gsutil: For interacting with Cloud Storage
- bq: For BigQuery
- kubectl: For Kubernetes clusters
- docker: For containers
- git: For version control
- nano, vim, or code: For editing files directly in the shell (with GUI editor support)
Conclusion
Google Cloud Shell is a robust and flexible environment that allows you to manage, test, and deploy cloud resources quickly and securely—all from a browser. In this guide, we launched Cloud Shell, explored its features, deployed a web app, worked with Cloud Storage, and learned how to clean up resources properly.
Work faster with Google Cloud Shell
Access your GCP resources instantly from any browser—no setup required. Cloud Shell comes with pre-installed tools, persistent storage, and built-in security. It’s the easiest way to manage and automate your cloud projects.
📞 Talk to an expert now and simplify your workflow.
FAQ
What is Google Cloud Shell?
It’s a browser-based command-line tool that provides access to your cloud resources. You can manage projects, run commands, and use development tools without installing software locally.
How do I access Google Cloud Shell?
You can launch it directly from the Cloud Console. Just click the terminal icon in the top navigation bar, and it will open in your browser.
Is my data persistent in Google Cloud Shell?
Yes, your home directory is persistent. Files stored there remain accessible across sessions, even if the virtual machine instance is terminated.
Can I customize my development environment?
Absolutely. You can install additional tools, configure settings, and personalize your workspace to suit your workflow.
What are the key features of Google Cloud Shell?
It includes a built-in code editor, pre-installed utilities, and seamless integration with Google Cloud APIs. You can also run interactive tutorials directly from the interface.
How do I manage projects and resources using Google Cloud Shell?
You can use gcloud commands to manage your projects, deploy services, and monitor resources. The shell provides full access to your cloud environment.