AWS Signer is a fully managed service that ensures the integrity and authenticity of your software by digitally signing code, images, and other artifacts. It is particularly useful in secure software distribution, helping to prevent unauthorized modifications or tampering. It supports multiple signing formats and integrates seamlessly with AWS services like Lambda, S3, and CodePipeline. In this guide, we will walk through the steps to create a signing profile, sign an artifact, and verify the signature using AWS CLI and a Python-based automation script. This hands-on approach will help you understand how AWS Signer fits into a secure software development lifecycle.
In this guide, we will:
- Set up AWS Signer.
- Create a signing profile.
- Sign a sample file using AWS Signer.
- Verify the signature using Python.
Prerequisites for AWS Signer
Ensure you have:
- An AWS account
- AWS CLI installed (aws –version to check)
- Python 3 installed (python3 –version)
- Boto3 installed (pip install boto3)
Step 1: Configure AWS CLI
Set up your AWS credentials if you haven’t already: `aws configure`
Provide:
- AWS Access Key ID
- AWS Secret Access Key
- Default region (e.g., us-east-1)
- Output format (default: table)
Step 2: Create a Signing Profile
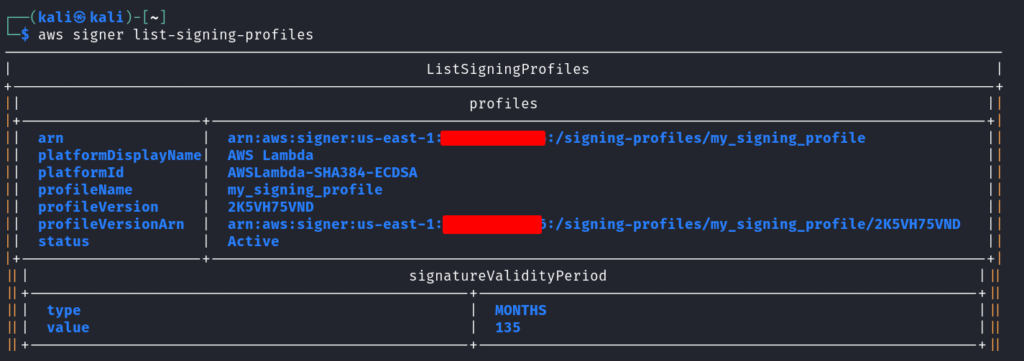
A signing profile is required to define the signature algorithm and signing configuration. Run: `aws signer put-signing-profile –profile-name my_signing_profile –platform AWSLambda-SHA384-ECDSA`

This creates a signing profile named my-signing-profile for AWS Lambda code signing. List all the signing profiles using the command: `aws signer list-signing-profiles`
Step 3: Upload the File to Sign
Create a test file: `echo “Hello, AWS Signer!” > testfile.txt`

Upload the file to an S3 bucket (replace your-bucket-name with your actual bucket name): `aws s3 cp testfile.txt s3://your-bucket-name/`

Step 4: Start the Signing Job
Now, initiate a signing job using the command:
`aws signer start-signing-job –profile-name my_signing_profile –source ‘{“s3”: {“bucketName”: “signer-test-1234”, “key”: “testfile.txt”, “version”: “null”}}’ –destination ‘{“s3”: {“bucketName”: “signer-test-1234”, “prefix”: “signed/”}}’`

This creates a signing job that takes testfile.txt, signs it, and places the signed file in the signed/ folder in the same S3 bucket.
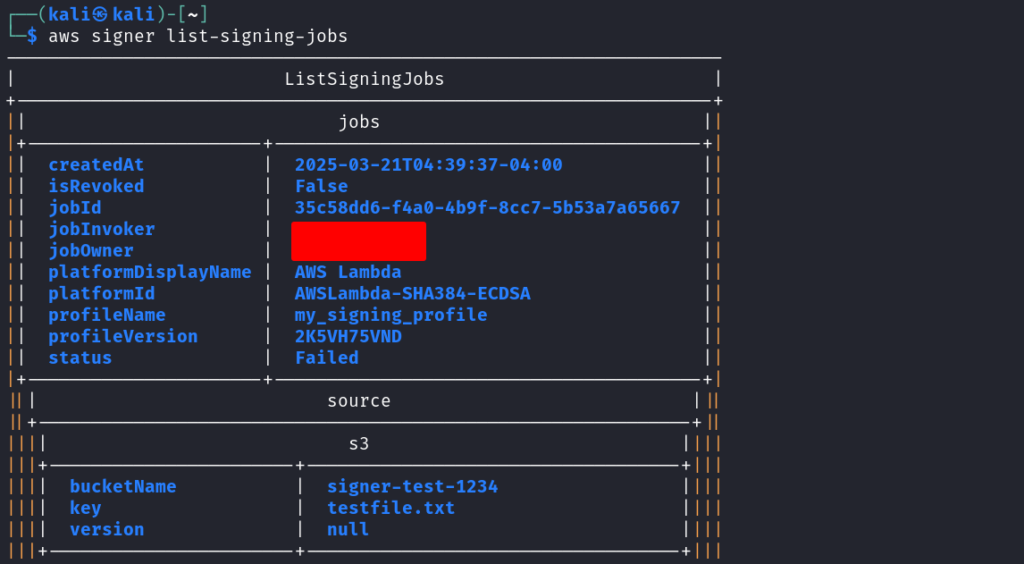
You can check the job status using: `aws signer list-signing-jobs`
Step 5: Verify the Signature using Python
Once the signing process is complete, AWS Signer will generate a signed file and a signature file. We can now verify the signature using a simple Python script.
import boto3

import json

from datetime import datetime

# Initialize AWS Signer client

client = boto3.client(“signer”)

# Replace with your actual signing job ID

job_id = “your-signing-job-id”

# Get signing job details

response = client.describe_signing_job(jobId=job_id)

# Convert datetime objects to string

def convert_datetime(obj):

if isinstance(obj, datetime):

     return obj.isoformat()  # Convert datetime to string

raise TypeError(“Type not serializable”)

# Print the response (after converting datetime objects)

print(json.dumps(response, default=convert_datetime, indent=4))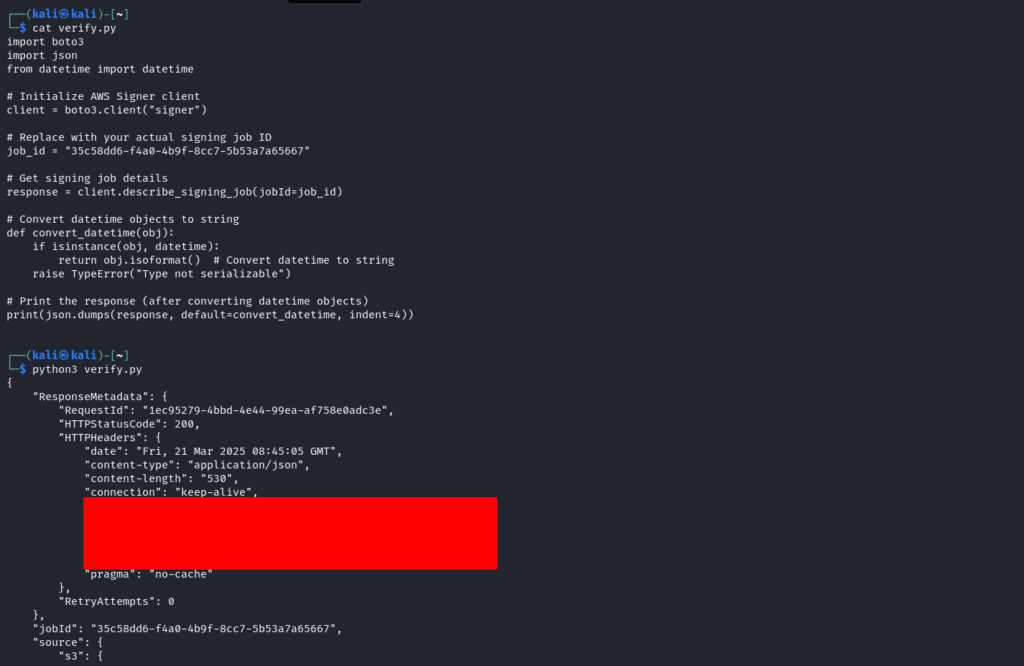
Step 6: Clean Up
After completing the demo, clean up the resources to avoid unnecessary charges.
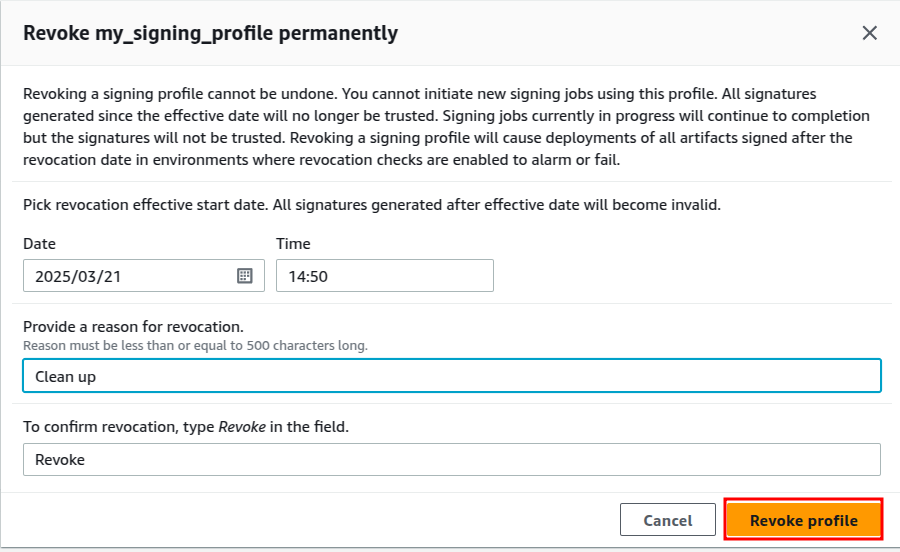
Head to AWS Signer and select the signing profile then click on Revoke Profile.
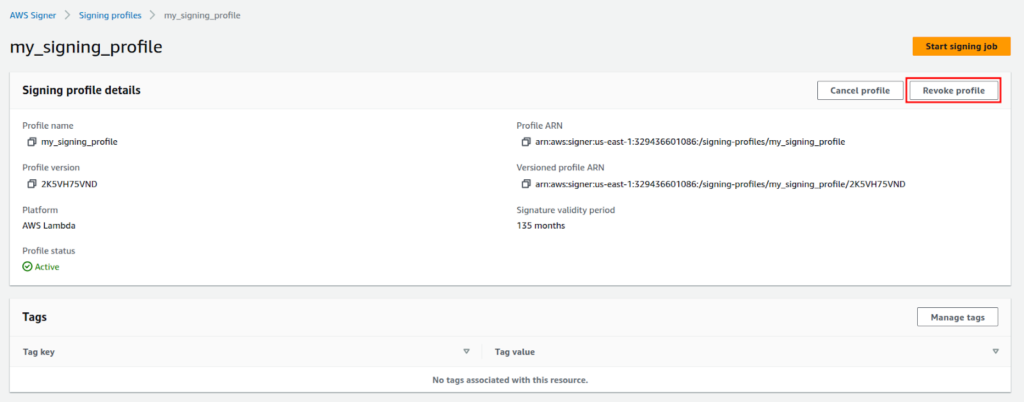
Provide the following details and proceed.
AWS Signer
Integrating AWS Signer into your CI/CD pipeline is secure, but if not scoped well, it can also be expensive. Elite Cloud helps configure signing jobs to balance trust and cost.
Reach out to implement secure signing that respects your budget.
Conclusion
AWS Signer is a powerful tool for ensuring the integrity and trustworthiness of your code. In this demo, we walked through the process of creating a signing profile, signing a payload, and verifying the signature using a Python script. You can extend this example to sign and verify more complex artifacts like Lambda functions or container images.
By integrating AWS Signer into your CI/CD pipeline, you can automate code signing and ensure that only trusted code is deployed to your environments.
FAQs
What is AWS Signer used for?
AWS Signer provides secure, managed code signing to verify that your software hasn’t been tampered with. It helps protect Lambda functions, container images, and more.
How do I create a signing profile in AWS Signer?
Use aws signer put-signing-profile to define a profile with a chosen algorithm and platform, such as AWS Lambda. This is required to start signing jobs.
Can AWS Signer sign any file type?
Yes, you can sign text files, code packages, container images, and more, as long as the file is stored in Amazon S3 before initiating the signing job.
How do I verify a signed file?
You can retrieve job details via AWS CLI or use Boto3 in Python to inspect the output signature and confirm successful validation of the artifact.
Is AWS Signer suitable for CI/CD pipelines?
Absolutely. AWS Signer integrates with CodePipeline and other AWS tools, enabling automated, secure signing throughout your development workflow.


